Dyson at the top of popularity fascinates you with some great skills. Dyson is one of the best vacuum brands on the market. Since you have a Dyson you know what it can do for you.
Like any device, Dyson vacuums can be a problem. But before you replace it, you have to think of something. If you’re vacuum is not creating the suction as before and is not satisfying you, then perhaps the vacuum needs to be cleaned.
Ask yourself when you last cleaned the vacuum. Due to daily use, dirt accumulates at each of its points and they lose their energy. Let’s break down all the Dyson vacuum cleaning points today.
How to Clean a Dyson Canister Vacuum?
You need to take some steps to clean the vacuum nicely. It is possible to clean any Dyson vacuum by following these steps .This will help you figure out how to maintain the efficiency of your Dyson vacuum as it is an expensive investment. You will need some tools to do the job, of course keep it in front. It is advisable to choose a place outside your house for vacuum cleaning so that it does not get dirty in the house.
Things You’ll Need
- Air Compressor, or a can of compressed air
- Water
- Scissors or knife
- Flathead Screwdriver
- Dish soap
- paper towel
- Microfiber Cloth
Step: 1- Unplug the Dyson
The first thing you need to do to clean a vacuum is to have all the necessary tools at hand. This will make the task easier to clean, if you do not do it, the task may seem a bit troublesome to you.
Then keep the vacuum unplugged. Maybe when you clean the floor you think it is important to clean your vacuum and you get stuck. If it is plugged in, any accident can happen as soon as it comes in contact with water
Step: 2- Empty the Canister

The place to do the work should be chosen where the return of dust is not negative for you, because Dyson is always a bagless vacuum, it can spread when they empty their dust containers.
The dust canister is located just below the cyclone. Dyson Vacuums have a red button to empty the dust canister. It is definitely next to the dust container’s comes. If you find it, check your manual to get the correct information. Do not pull the lid randomly as it may break.
Remove as much dirt as possible, shake well. Since these are dry dirt it will come out about 95%. Use a microfiber cloth to clean their insides better. It is best if it is wet. Wipe the inside of the dust canister. As if the canister is absolutely dust free.
Dyson recommends not using detergents or chemicals to clean dust containers, as this can make the parts sticky. It can be an accident even if their cyclone does not put any kind of water in the part of the motor
Step: 3- Remove Hair from the Brush
Roller brushes experience the dirt closest to your floor. Separate the vacuum roller brush to clean it. Remove soleplate for some Dyson vacuums. A screw with a plain head will come in handy.
Another caveat is that most of the time when we open these items, we open them and leave them there, as it can lose these small items and frustrate you. You may even be unable to reassemble the device. So I recommend keeping the screws in a container or place where you can easily access them.
After opening, gently pull out the roller. In many cases, it can be a bit tight so if you have trouble opening it, be sure to check the vacuum manual and do it accordingly.
When cleaning it after the roller brush is finished. First, remove the loose dirt on the roller. You can use cloth or paper towels to do this. Since your main culprit is hair, you need to do it perfectly. Hair is usually an element that is involved with all rollers; It’s a bit challenging but not hard to clean up completely. From my experience, I can say that a SIM ripper may be most suitable for this job. Yes! One pair of scissors is a great choice because the hair can be cut into smaller sections and the roller can be loosened from the hair. However, it is a completely sharp object that can cut through the bristle of the roller and destroy the roller with a little blindfold. So I recommend a seam ripper.
Cut and cut one side of the spiral parts with the help of a seam reaper. Remove all hair in this way. It is important to be careful, take a magazine or cloth to a clean place so that the short cut hair does not spread later. It can be easily transferred to the trash can.
Step: 4- Unclog the Hose
Dyson may have a button to disassemble the hose pipe of the vacuum. First, clean the loose dirt from the hose pipe, then you should pay attention to the inside. Since it is a compressed area, it is not possible to clean it directly by hand. You can shake it to get Debris out
Make a mixture with water to clean the inside of the hose. Mix ordinary detergent with water and immerse the hose in that mixture. Make sure the mixture has entered the hose pipe. It is best to keep it completely submerged so that the outer surface of the hose pipe can be cleaned at the same time.
Wipe the outer surface with a damp cloth. Remember to avoid the use of unnecessary harmful chemicals. Stir inside with a brush. This helps to loosen the dirt more. A suitable brush is required in this case or you may not be able to reach the end of the hose pipe. In this case a hose or bottle cleaning brush can be used, which is thin and long.
Since most of the time the foot motion becomes foul smelling after being unclean and ensures the stay of germs so the pipe should be sanitized after washing. For this, mix half a cup of baking soda with two cups of vinegar in a bowl and pour it inside the hose. Close one end of the pipe but it will hold the mixture longer. Vinegar and baking soda contain natural acids that are capable of removing strong odors.
Step: 5- Clean the Filter

This is the important point that’s how our vacuum becomes weak. This is an important point though it is beyond our comprehension how suction can be lost due to a clogged filter.
Dyson vacuum must have a motor filter and an additional filter that prevents allergies. Both the motor filter and the HEPA filter can be contaminated with filters that cause blockage in the suction.
It is important to clean the filters at a certain time. Do this at least once a month. You need to remove it to clean your vacuum filter so follow the manual so that it is not damaged, because it can be different in each model.
But notice if it’s time to replace them. It is important to do this in a timely manner when it comes time to change filters.
Step: 6- Wipe Outside of the Vacuum
If you have washed your filter, make sure it dries well. If new filters are installed, no problem drying, just install properly.
It is important to dry the vacuum filter because if it is wet, dust can clog the filter. It can jam a lot faster. Be sure to check the manual for vacuum filter replacement. If this replacement is wrong it can damage the vacuum.
The filter can be gently wiped with a cloth to dry. In this case a hair dryer can come in handy. But take the time to do the job. It is best to air dry
Allow the filter as well as other parts to dry, which have already been washed. For the sake of your time, wipe the accessories with a dry cloth. It is best to dry it in the air.
How to Clean and Replace Dyson Filter?
If you are just cleaning the filter instead of the whole unit, you need to know. See below how to clean the Dyson filter.
1. Turn off the Dyson
Your first job is to disconnect the vacuum. This should be done in case of cleaning any device.
2. Remove your Dyson Filter
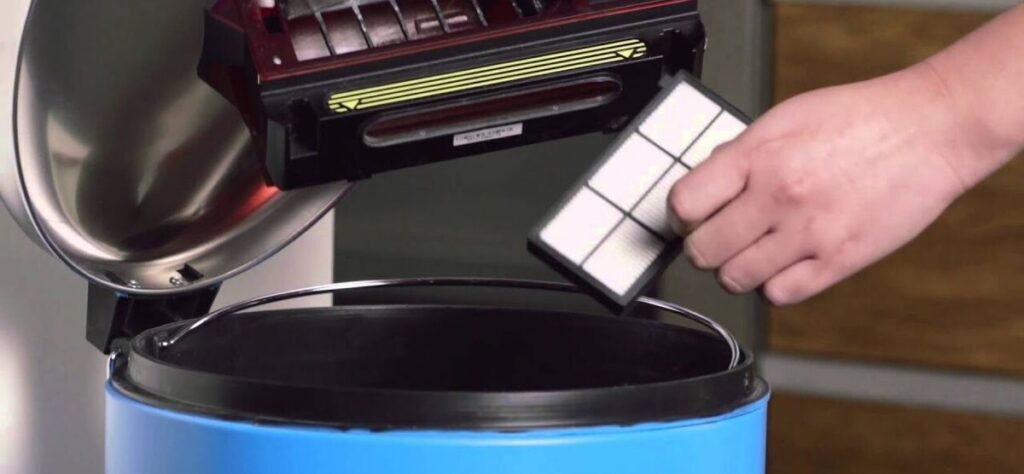
Remove the Dyson filter. To clean, first remove the filter from the designated area.
3. Wash the Filters
Rinse the filter thoroughly with cold water. Never use hot water. This can damage the quality of the filter. Dyson further recommends not using any detergent or dish soap to clean the filter and that any chemicals are completely prohibited. Dip the water in, wash the filter and gently drain the water.
4. Dry the Filters
It cannot be reinstalled without drying well so take at least 24 hours to dry well. Remember, never put it in front of a flame or microwave to dry.
5. Replace the filters
Reinstall the filter. If you can’t do it, don’t forget to check the manual.
How to Clean the Clear Bin and Cyclone?
Steps 1 – Remove the Cyclone and Clear Bin
Remove the bin assembly by pressing the catch on top of the carry handle.
Step 2 – Empty the Clear Bin
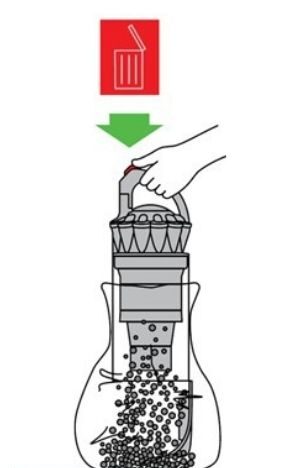
Press the catch on top of the carry handle again to release dust directly into a waste bin.
Step 3 – Separate the Cyclone Unit from the Clear Bin
To separate the cyclone unit from the clear bin presses the red button to open the clear bin base. This exposes a small silver button behind the red opening mechanism. Press the silver button and separate the cyclone unit from the clear bin. Things to remember:
- Clean the clear bin with cold water only.
- Ensure the clear bin is completely dry before replacing.
- Do not use detergents, polishes or air fresheners to clean the clear bin.
- Do not put the clear bin in a dishwasher.
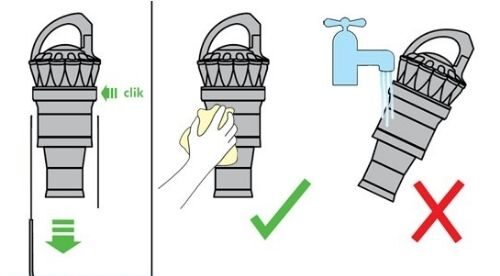
- Do not immerse the whole cyclone unit in water or pour water into the cyclones.
- Clean the cyclone shroud with a dry cloth or dry brush to remove lint and dust.
Step 4 – Reassemble the Bin and Cyclone

Fit the cyclone shroud into the clear bin so that the silver button clicks and engages. Close the clear bin base so it clicks into place. Push the cyclone and clear bin unit into the main body of the machine; it will click into place.
Frequently Ask Question (FAQ)
If you are still involved with some of the questions, you can find the answers to some of the most frequently asked questions.
Q: is it necessary to replace the filter when cleaning the vacuum?
Ans: No, it’s not; you don’t have to replace the filter if it’s not time to change your filter and you’re cleaning the vacuum right away. In this case, wash the filters well and dry them well before resetting.
Q: Is it time-consuming to clean the vacuum?
Ans: Possibly, you need 1 to 2 hours to do the job. This is because it takes time to open the vacuum parts, wash and dry them, and assemble them.
Q: How often should I clean the vacuum in a month?Ans: Try to wash your entire vacuum unit twice a month. If your days are really busy, you must clean the whole unit at least once a month. However, after using the vacuum every time, you must empty the canister after the dirty pick up.
